MiniDV Digital Video
What you'll need:
- A digital MiniDV camera
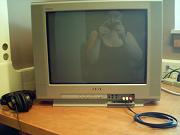
- A TV (you can live without this)
- A firewire cable

- An RCA cable
- A G5 with Final Cut Pro installed


Instructions
1. Connect the digital MiniDV camera to the TV using an RCA cable.

2. Turn on the camera in VCR mode. Open the LCD display. Press the menu button. Scroll to the second icon from the top (V). Press the scroll button. The settings should be as follows: CH SELECT: CH1, CH2; AUDIO MIX: scroll bar should be all the way to the left; A/V-DV OUT: ON. Once these settings are correct, exit the menu. Now you're ready to send your video to the computer via firewire.
3. Insert a tape into the camera. Fast forward and rewind it.
4. Open Final Cut Pro. Final Cut Pro may prompt you to set a scratch disk. If so, set the scratch to a folder on the desktop called Final Cut Scratch.
5. Once Final Cut is open, click File>Save Project As and enter a name for your new project. Select the appropriate folder in which to save the project. Click Save.
6. Click on File>Log and Capture. In the Log and Capture window, there are 3 tabs on the right hand side: Logging, Clip Settings and Capture Settings.
7. Click on the Capture Settings tab. The settings here should be as follows: Device Control: Firewire NTSC; Capture/Input: DV NTSC 48 kHz; Scratch Disk: should be set to a folder called "Final Cut Scratch" on the local desktop. All boxes at the bottom should be unchecked, unless you choose to limit the length of time you wish to capture.
- To set the Scratch Disk, click Scratch Disk in the Capture Settings tab and click Set. The Choose a Folder window will open. Click Desktop and select Final Cut Scratch. Then click Choose. If no Final Cut Scratch folder exists on the desktop, click on New Folder then name it, click Create, and select it from the list, then click Choose.
8. Click on the Clip Settings tab. The settings should be as follows: Capture: Aud + Vid; Audio Format: Ch 1 & Ch 2 or Stereo.
9. Click on the Logging tab. Enter the following information: Reel: enter the accession or identifying number/name of the VHS tape you are digitizing; Description: enter a title describing the content of the tape.
10. Connect the camera to the computer with a firewire cable. You should now be ready to capture your MiniDV tape.

11. Press play on the camera and Capture>Now on the Log and Capture window.
12. When the tape ends, or you have captured all the video you want to for this session, press ESC on the keyboard and Final Cut will stop capturing.
13. Save the project.
14. Drag the clip into the timeline. Check the beginning, middle and end of the project to ensure the audio and video were captured accurately, and that there is no disjuncture between the two. If you find disjuncture, isolate where it began, try to figure out what caused it (a dropped frame, damaged tape, use of the computer during capture, etc.) and re-capture the video.
15. Record the date and time of digitization, your initials, as well as any relevant technical information and comments into the relevant file or spreadsheet.